Showing posts with label Sewing. Show all posts

Friday, August 31, 2012

.diy: pom-pom crib skirt tutorial.

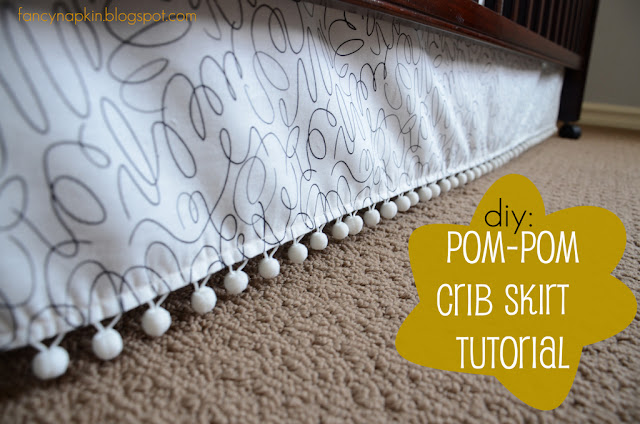
I have another nursery related tutorial to show you all. The Easy Pom-pom Crib Skirt!
Initially was going to just buy a standard crib skirt, but after knowing how easy the diy crib sheets where, I figured I'd again take a crack at making my own. This also gave me the opportunity to customize them a little and put my own personal spin on it with those wicked cool pom-pom's.
Done and Done.
I'd consider this another check off the old baby to-do list :)
So here's how I made mine. Easy, Quick and Unique.
1] Get your supplies. You will need: 2 yards of fabric [for a standard sized crib], scissors, sewing machine, pom-pom thread [if that is even what it's called], measuring tape, pins, flat thumtacks, and an iron.
2] Measure your crib. You'll need three measurements and it'll probably be very similar to mine if you have a standard-sized crib. Length of the longest side [51.5 inches], Length of the two shortest sides [27.5 inches] and height when the mattress is at it's highest setting [20 inches].

3]  Cut your fabric. You'll be cutting out 3 rectangles of fabric [two short lengths and one long length. I didn't do the backside as my crib will be against the wall]. Add 2 inches to the height measurement so that you have room for the top of your fabric to wrap over the top of the mattress support beam. Add 1 inch to all the measurements for the seam.
  • One long rectangle length for the front. For me this was 52.5 inches x 23 inches [length of the long side, plus 1 inch seam allowance x height, plus 2 inches plus 1 inch seam allowance].
  • Two short rectangle lengths for the sides. For me, this was 28.5 inches x 23 inches [length of the short side, plus 1 inch seam allowance x height, plus 2 inches plus 1 inch seam allowance].
**I found this to be the hardest part of the whole project as you need to cut these panels straight. I used a bunch of pins and measured all the way around pinning every 2 inches or so and then cutting along the pins. Seemed to work pretty good.

4] Hem and sew sides. You will now need to iron and sew all four sides of each rectangle piece which is super easy. Turn up 1/2 inch on each side, iron that down and then sew. This will make your edges nice and clean.

5]  Be happy that you are almost finished. Turn it over and make sure it looks similar to this.

6] Attach your pom-pom ribbon. Now you'll need to secure your pom-pom ribbon by sewing it to the bottom edge of each of the three rectangle pieces. I just pinned mine at a couple spots and then sewed it onto the panels. Pretty darn easy.
Hint: When sewing the pom ribbon on, make sure the you follow the same hem as before so that you won't see two rows of thread.

7] Attach all panels to your crib. Now the fun part, attach each panel to the crib with flat thumbtacks. I have a crib with a wood support beam that I just pinned them too. If you have wire springs instead of a wood beam, at this point you'll have to sew a ribbon onto each corner of the panels and then tie them to the springs. I found a great tutorial by Christine, over at her blog Just Bella.

7] Put your Mattress back and high-five yourself on the back for a job well done! Or is that something that I just do? Either way, You're finished! Now you can go hide all those extra storage boxes of baby's clothes, diapers, books and toys.

Tuesday, August 21, 2012

.diy: crib sheet tutorial.

Remember my impossibly long 'baby to-do list' that everyone figured would make me want to pull all my hair out? Well, things are progressing nicely on it and with the husband's help, I have managed  to check a few more items off the list [yeah me!].
Most importantly, and what I want to show you today, is what I worked on this weekend.
DIY: Crib Sheets.
I am first going to admit that I have spent way too much time searching all over the mighty internet for modern crib sheets, with very limited luck. And although yes, there are certainly a lot of options if you look hard enough, most of the cute ones [and all the ones i gravitate too] come with a hefty price tag. Ouch.
So after realizing that I can probably just make them myself, I busted out my old sewing machine [a gift from my sweet father that is not used nearly enough] and attempted to create my little babe's new sheets.
And I am happy to report, that they actually turned out pretty darn cute. Even if I did choose a christmas-ish fabric in the middle of August :)
*fabric found at fabricland
With the help of a mis-mash of tutorials, via youtube & pinterest, here's how this beginner sewer [moi!] made her very own crib sheets. I hope you give it a try.....you might just surprise yourself. I know I did!
DIY:
[step one] Collect your supplies.
Note: Make sure you pre-wash your fabric before cutting. It may shrink a little and I'd be so upset if you did all the work, just for it not to fit once washed!

[step two] Cut your fabric into a rectangle that's 45 x 67 inches [114.5 x 171 cm].

[step three] Cut an 8 x 8 inch [20.5 x 20.5 cm] square out of each corner.

[step four] Pull the two sides of one corner together, with the good side of the pattern on the inside. Pin together to make a 'pocket'. Do this for each of the four corners. Then sew each pinned side together.

[step five] Now iron the edge of your fabric over 1/4 inch going all the way around. This is creating a  casing which you will string your elastic through.

[step six] Sew down the casing, going the entire way around your fabric.
Note: Make sure you put a pin at the start and stop point so that you leave an opening to get the elastic in and out. Start sewing at the start point, and stop sewing at the stop point. Easy enough, right?

[step seven] Attach a safety pin [just large enough that it'll fit in between your casing] on one end of your 1/4 inch wide elastic and pin down the other end to your sheet [this is so that it doesn't get pulled all the way through]. Start stringing the elastic through the casing, all the way till it reaches the other side.

[step eight] Sew the two ends of the elastic together, using a zigzag stitch to secure it snugly. Then sew up the open hole of the casing for a clean finish. And your DONE!

Now go make a bunch more! It's what I did! Here's a few others that I quickly crafted....
Next up? A crib skirt, which is very needed to hide all that extra storage under the crib and hide that wood bar. And maybe some burp cloths with all the extra fabric pieces?
I think I'll hunt down a cooler fabric store this time around though....now that I'm an expert and all ;)
So, what do you think?

Sunday, February 27, 2011

.To Sew.

Ladies and Gentlemen.
Take a look at the new supplies for my upcoming sewing projects. Yes. 2 of them.
I figure it's about time to get back in the saddle so to say. Miss (err, now Mrs.) Crafty Erinn will be out in full force shortly. It's been a while since I've tackled any sort of sewing project (actually since christmas and our new stockings) and I'm going to start off small (you'll soon see).
I do have one problem: I need to finish that other 'little' project of mine, currently in the works...
hello craft room!
I feel the creative vibes coming on strong.
And I Cannot wait.
And don't you just love those colors! Eeeek!
Now I just have to sit down and get at 'em....ohh, and finish all the others projects currently on the go!
So typically me.
Note to self: Finish one thing before starting another.
Ohh, But the colors get me so excited.....
Tutorial soon to follow.

P.S. The hubby returns today from a night of skiing and debauchery with the boys. This has me very, very excited as well. I seriously missed that scruffy boy.
Shh. Just don't tell him that.
xo